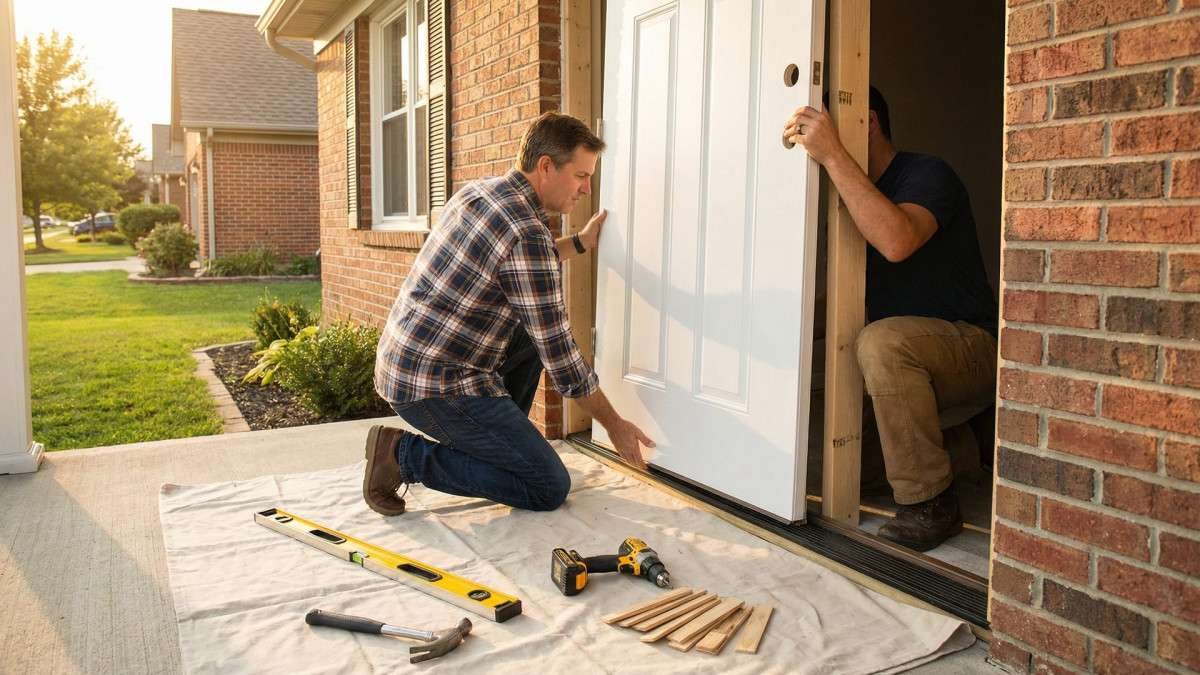
A worn, drafty, or damaged exterior door costs homeowners significant money in energy bills while simultaneously dragging down a property’s curb appeal. While replacing an entry door might seem like a job strictly reserved for professional contractors, it is actually a highly manageable weekend project for an intermediate DIYer, explains Helios Property Management specialists. With the right tools, careful measurements, and a clear understanding of the installation process, you can dramatically upgrade your home’s entrance and save hundreds of dollars in labor costs.
According to industry data, the average cost to have a professional install an exterior door ranges from $1,500 to over $5,000, with labor alone accounting for $200 to $500 of that total. By taking on the project yourself, you can redirect that labor budget toward purchasing a higher-quality door—such as a durable steel or fiberglass model. In fact, the 2025 Cost vs. Value Report indicates that replacing an entry door with a steel unit yields an impressive 216% return on investment at resale.
This comprehensive guide will walk you through exactly how to replace an exterior door step-by-step. From deciding between a prehung and a slab door to the final steps of weatherproofing and trimming, you will learn the precise techniques required to ensure your new door is perfectly plumb, secure, and sealed against the elements.
Prehung vs. Slab Door: Which One Do You Need?
Before replacing an exterior door, you must choose between a prehung door and a slab door. A prehung door comes already attached to a new frame and hinges, making it the best choice for replacing an old, damaged frame. A slab door is just the door itself, requiring you to mortise hinges and cut hardware holes.
What Is a Prehung Door?
A prehung door is a complete package. It includes the door slab already mounted onto a three-sided frame (the jambs) with hinges attached. It also typically includes the weatherstripping and the bottom threshold (sill). If your current door frame is rotted, damaged, or out of square—which is common in older homes—you absolutely need a prehung door. While they are heavier and bulkier to transport, prehung doors are significantly easier for DIYers to install because the complex geometry of hanging the door perfectly within its frame has already been done at the factory.
What Is a Slab Door?
A slab door is exactly what it sounds like: a rectangular piece of wood, steel, or fiberglass without hinges, a frame, or hardware. You should only purchase a slab door if your existing door frame is perfectly square, level, and free of any rot. Installing a slab door requires advanced carpentry skills, as you must precisely route the mortises (cutouts) for the hinges and drill the holes for the lockset to match the existing frame perfectly.
Understanding Door Handedness (Left-Hand vs. Right-Hand Swing)
When ordering a new door, you must specify its “handedness” to ensure it opens in the correct direction. To determine this, stand outside your home facing the door. If the hinges are on the left side and the door pushes inward away from you, it is a left-hand inswing door. If the hinges are on the right side and it pushes inward, it is a right-hand inswing door. Getting this wrong will result in a door that cannot be installed in your space.
| Feature | Prehung Door | Slab Door |
|---|---|---|
| What it includes | Door, frame, hinges, threshold, weatherstripping | Just the door itself (no hardware or frame) |
| Best used when… | The old frame is damaged, rotted, or out of square | The existing frame is perfectly square and undamaged |
| DIY Difficulty | Intermediate (requires lifting and shimming) | Advanced (requires precise routing and mortising) |
| Cost | Higher initial cost ($300–$1,500+) | Lower initial cost ($150–$800+) |
Tools and Materials You Will Need
Replacing an exterior door requires standard carpentry tools and specific weatherproofing materials. Essential tools include a 4-foot level, pry bar, drill, and caulk gun. Crucial materials include the prehung door, wood shims, exterior-grade silicone caulk, and low-expansion window and door foam.
Tools List
To complete this project smoothly without mid-installation trips to the hardware store, gather the following tools:
First, you will need a reliable 4-foot level; a standard torpedo level is too short to accurately gauge if a tall door frame is perfectly plumb. You will also need a tape measure, a flat pry bar (for removing old trim), a framing hammer, and a utility knife. For fastening, a power drill or impact driver with various driver bits and drill bits is essential. Finally, a caulk gun and a reciprocating saw (or oscillating multi-tool) will be necessary for cutting through old nails and applying sealant.
Materials List
The materials required go beyond just the door itself. You will need:
A bundle of wood or composite shims, which are critical for leveling the door within the rough opening. You must also purchase high-quality exterior-grade silicone caulk to seal the threshold and trim. To insulate the gaps between the new door frame and the house framing, buy a can of low-expansion polyurethane foam specifically formulated for doors and windows (standard foam expands too much and can bow the door frame). You will also need 2.5-inch to 3-inch exterior wood screws, a sill pan (highly recommended for waterproofing), and the new lockset and deadbolt hardware.
Cost Breakdown: DIY vs. Professional Installation
Choosing to install the door yourself drastically alters the project’s budget. Here is a general breakdown of what to expect in 2025:
| Expense Category | DIY Cost Estimate | Professional Cost Estimate |
|---|---|---|
| Door Unit (Steel/Fiberglass) | $300 – $1,200 | $400 – $1,500+ (contractor markup) |
| Supplies (Caulk, Foam, Shims) | $50 – $80 | Included in labor quote |
| Labor | $0 (Sweat equity) | $200 – $500+ |
| Total Estimated Cost | $350 – $1,280 | $600 – $2,000+ |
Step 1 — Remove the Old Door and Frame
Removing the old door and frame is the first physical step in how to replace an exterior door. You must carefully detach the door slab, pry off the interior and exterior trim, and use a reciprocating saw to cut through the nails holding the old frame to the wall studs.
Detach the Door from Its Hinges
Start by removing the old door slab to make the work area manageable. Open the door and use a hammer and a nail punch (or a large nail) to tap the hinge pins upward and out from the bottom. If the pins are painted over or rusted tight, you can simply unscrew the hinges from the door frame using your drill. Have a helper hold the door steady as you remove the final screws or pins, as exterior doors are surprisingly heavy. Carefully carry the door out of the way.
Remove the Door Frame and Trim
Next, use a utility knife to score the caulk or paint lines where the interior and exterior trim meet the walls. This prevents the drywall paper or exterior siding from tearing when you remove the trim. Insert a flat pry bar behind the trim and gently pry it away from the wall. Once the trim is removed, you will expose the gap between the door frame (jamb) and the wooden wall studs (the rough opening).
To remove the old frame, take a reciprocating saw equipped with a metal-cutting blade and slide it into the gap between the frame and the studs. Cut through any nails or screws securing the frame to the house. Once all fasteners are cut, you can easily pull the entire old frame out of the opening.
Inspect the Rough Opening for Rot or Damage
With the rough opening fully exposed, take time to inspect the wood framing and the subfloor (the wood beneath the door threshold). Look for any dark, soft, or crumbly wood, which indicates water damage and rot. If you find rotted wood, it must be cut out and replaced with fresh, treated lumber before proceeding. Installing a brand-new door over a rotting subfloor guarantees future structural failures.
Step 2 — Measure the Rough Opening and Prepare the Sill
Measuring the rough opening accurately ensures the new door will fit perfectly, while preparing the sill prevents future water damage. You must measure the width and height in three places and install a waterproof sill pan before setting the new door in place.
How to Measure for a Replacement Door
To determine the size of the prehung door you need to purchase, measure the rough opening (the exposed wood framing). Measure the width across the top, middle, and bottom of the opening. Record the smallest of these three measurements. Next, measure the height from the subfloor to the bottom of the header stud at the top, again on the left, center, and right sides, recording the smallest number.
Your new prehung door unit must be slightly smaller than your rough opening—typically 1/2 inch to 3/4 inch narrower in width and 1/2 inch shorter in height. This gap provides the necessary room to insert shims and adjust the door until it is perfectly plumb and level.
Install the Sill Pan (The Step Most DIYers Skip)
One of the most critical steps in replacing an exterior door—and one frequently skipped by amateurs—is waterproofing the sill (the bottom of the rough opening). Water will inevitably find its way to the threshold over the years. To protect the wood subfloor, install a sill pan.
A sill pan is a rigid plastic or flexible flashing tape barrier that sits under the door threshold and features a slight lip on the back and sides to catch water and direct it outward. If using flexible flashing tape, apply it across the entire sill, wrapping it slightly up the sides of the framing and down over the front edge. Once the sill pan is in place, run three thick, continuous beads of exterior-grade silicone caulk along the bottom of the sill opening just before you set the door.
Step 3 — Position, Shim, and Secure the New Door
Positioning, shimming, and securing the new door is the most technical phase of the project. The door must be centered in the opening, shimmed perfectly plumb on the hinge side using a 4-foot level, and fastened securely to the wall studs using long screws.
Test-Fit and Center the Door Unit
Leave the plastic shipping clips attached to the new prehung door; these keep the door perfectly aligned within its frame during transport and installation. With a helper, lift the door unit and tilt the bottom threshold into the opening, resting it firmly on the beads of caulk you applied to the sill pan. Tilt the top of the door into place. Center the door left-to-right within the rough opening so that the gap is roughly equal on both sides.
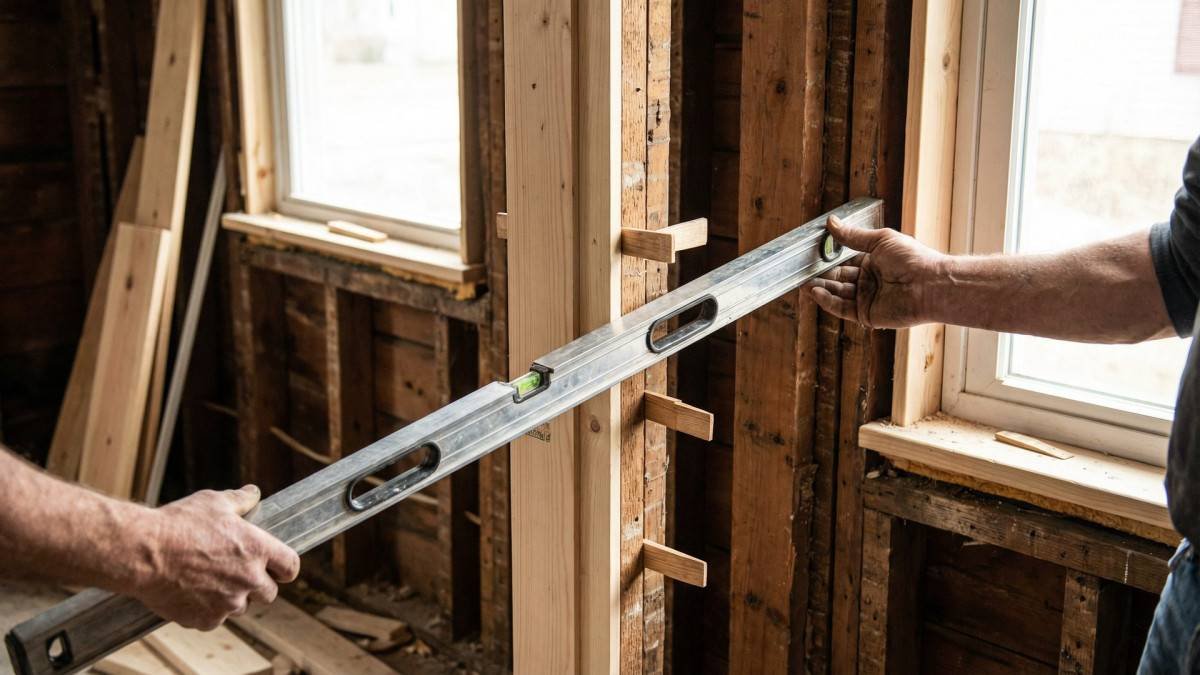
Shim the Hinge Jamb Until Plumb
The secret to a door that swings smoothly and stays open without drifting is a perfectly plumb hinge jamb. Place your 4-foot level against the hinge-side jamb. Insert pairs of wood shims (pushing one from the inside and one from the outside so they form a flat surface) into the gap between the jamb and the wall stud. Place shims directly behind where each of the three hinges is located.
Adjust the shims in and out until the level bubble is perfectly dead-center. Once the hinge side is perfectly plumb, drive a 2.5-inch or 3-inch exterior screw through the jamb, through the shims, and deep into the wall stud at each hinge location. Do not over-tighten, or you will bow the frame.
Secure the Lockset Jamb and Check the Door Gap
With the hinge side secured, remove the plastic shipping clips and carefully open and close the door. Look at the “reveal”—the gap between the edge of the door slab and the door frame. This gap should be an even 1/8-inch from top to bottom.
Close the door and move to the lockset side (the side with the handle). Insert shims near the top, middle, and bottom of the lockset jamb. Adjust these shims until the reveal is perfectly even all the way around the door. Once the gap is uniform and the door opens and closes smoothly, drive screws through the lockset jamb and shims into the wall stud.
Fasten the Door Permanently
To ensure the heavy exterior door does not sag over time, you must replace at least one short screw in each hinge with a long, 3-inch screw. Drive this long screw through the metal hinge plate, through the door jamb, through the shims, and deep into the structural wall framing. This anchors the heavy door slab directly to the house’s skeleton, preventing the frame from pulling away under the door’s weight.
Step 4 — Weatherproof, Trim, and Finish
Weatherproofing, trimming, and finishing are the final steps to replace an exterior door. You must insulate the gap around the frame with low-expansion foam, apply exterior caulk to seal out moisture, and install the final trim and hardware.
Insulate the Gap with Low-Expansion Foam
Move to the interior of the house. You will see a gap between the new door frame and the wall studs, filled only by the shims. Take a utility knife and score the shims, snapping off the excess so they are flush with the wall.
Next, take your can of low-expansion window and door foam and carefully spray it into the gap around the entire perimeter of the door. Warning: You must use foam specifically labeled “for windows and doors” or “low expansion.” Standard expanding foam expands with such force that it will bow your door frame inward, preventing the door from closing. Allow the foam to cure completely, then trim away any excess that puffs out using a utility knife.
Apply Caulk Around the Exterior Trim
Move to the exterior. If your prehung door came with exterior brick molding attached, you must seal it against the house. Load your caulk gun with high-quality, paintable exterior silicone caulk. Run a continuous, smooth bead of caulk along the seam where the exterior trim meets the siding of the house. Also, apply caulk where the bottom of the door threshold meets the porch or step. This creates an impenetrable barrier against rain and wind.
Install Hardware, Interior Trim, and Paint or Stain
Install your new door handle and deadbolt according to the manufacturer’s instructions. Test the locks to ensure the deadbolt slides smoothly into the strike plate without requiring you to push or pull forcefully on the door. If it binds, you may need to adjust the strike plate slightly.
Finally, measure, cut, and nail your interior casing (trim) around the door frame to cover the foam-filled gap. Fill the nail holes with wood putty, and finish the project by painting or staining the interior trim and the door slab (if it was sold primed and unfinished).
Common Problems and How to Fix Them
Even with careful measurements, DIY exterior door replacement can occasionally hit snags. Understanding how to troubleshoot common issues like a door that won’t latch or visible drafts will save you from frustration during the final stages of installation.
Door Won’t Latch or Close Properly
If the door bounces back open or the deadbolt won’t engage, the strike plate on the jamb is likely misaligned with the latch on the door. This often happens if the lockset jamb was screwed in too tightly, bowing the frame outward. First, try backing out the screws on the lockset jamb by a quarter turn. If that fails, you may need to unscrew the metal strike plate, chisel out a slightly larger mortise in the wood, and reposition the plate up or down by a fraction of an inch.
Visible Gaps or Drafts After Installation
If you can see daylight coming through the bottom corners of the door, the weatherstripping is not making full contact. Most modern prehung exterior doors feature an adjustable threshold. Look for heavy-duty screws along the top of the bottom threshold. Using a screwdriver, turn these screws counterclockwise to slightly raise the threshold until it makes snug contact with the rubber sweep on the bottom of the door. You should be able to slide a piece of paper under the closed door with moderate resistance.
When to Call a Professional
While this is a manageable DIY project, you should call a professional contractor if you discover severe structural rot in the wall studs or floor joists beneath the door. Furthermore, if you wish to expand the doorway to accommodate a larger door or sidelights, this requires altering the structural header above the door—a job that requires a permit and professional framing expertise.
Frequently Asked Questions
How long does it take to replace an exterior door?
For a beginner to intermediate DIYer, replacing an exterior door typically takes between 4 to 8 hours. This includes removing the old door, prepping the opening, shimming and securing the new prehung unit, and applying insulation and trim. Experienced carpenters can often complete the job in 2 to 4 hours.
Can I replace an exterior door myself?
Yes, you can replace an exterior door yourself if you purchase a prehung door rather than a slab door. The project requires basic carpentry tools, a 4-foot level, and careful attention to shimming the frame plumb. Because exterior doors are heavy, it is highly recommended to have a second person assist with lifting and positioning.
How much does it cost to replace an exterior door?
The cost to replace an exterior door varies widely. If you do it yourself, you will only pay for the door and materials, which typically ranges from $350 to $1,200 depending on whether you choose steel, fiberglass, or wood. Hiring a professional to supply and install the door generally costs between $1,500 and $5,000.
Do I need a permit to replace an exterior door?
In most municipalities, you do not need a building permit to replace an existing exterior door with a new door of the exact same size, as this is considered routine maintenance. However, if you are widening the rough opening, altering the structural header, or cutting a new doorway into a solid wall, a permit is almost always required.
What size exterior door do I need?
To determine the size of the exterior door you need, remove the interior trim and measure the rough opening (the wood framing) from side to side and top to bottom. Your new prehung door unit should be roughly 1/2 inch to 3/4 inch narrower and 1/2 inch shorter than the rough opening to allow room for leveling and shims.
Conclusion
Learning how to replace an exterior door is one of the most rewarding DIY projects a homeowner can undertake. Not only does it instantly elevate the curb appeal and security of your property, but it also provides a massive return on investment by eliminating drafts and cutting professional labor costs out of the equation.
The difference between a frustrating installation and a flawless one comes down to patience during the preparation phase. By choosing a prehung door, accurately measuring your rough opening, installing a waterproof sill pan, and meticulously shimming the frame until it is perfectly plumb, you ensure that your new door will swing effortlessly for decades. Gather your tools, enlist a helper, and take the first step toward a more beautiful and energy-efficient home.